Getting Started
When it comes to creating forms, the process can be both seamless and intuitive with FormPress. In this guide, we'll walk you through the steps to get started.
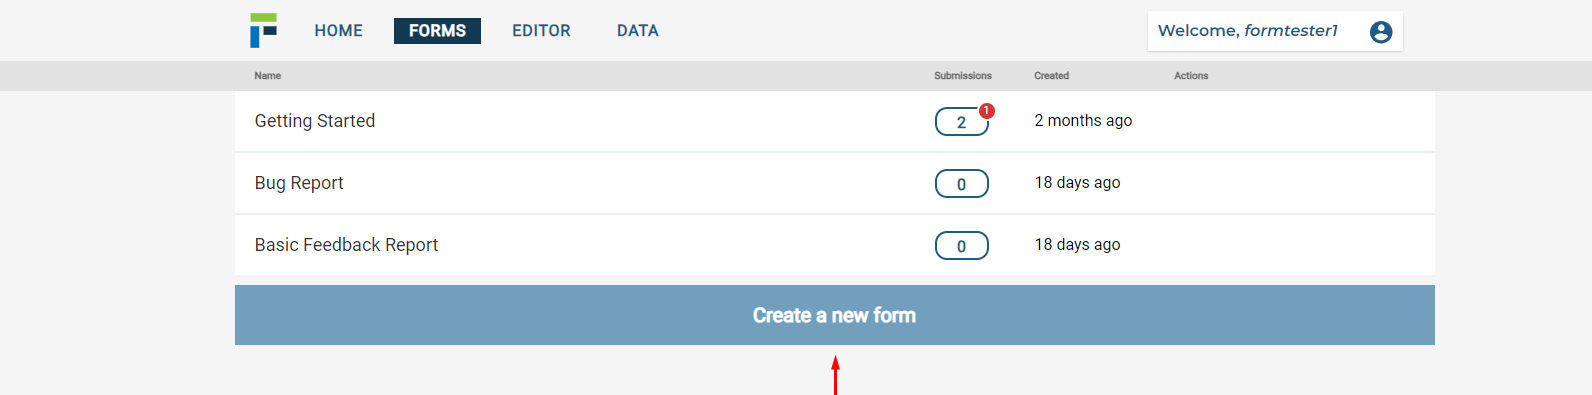
Step 1: Creating Your Form
- Click "Create New Form"
Start your form creation by clicking the "Create New Form" button. You can also click "+" button at the top. You have two options: starting with a template or a blank form. If you're looking for inspiration, check out our blog post on customizing templates. Whether you choose a template or a blank form, you'll be on your way to crafting your blazing fast form.
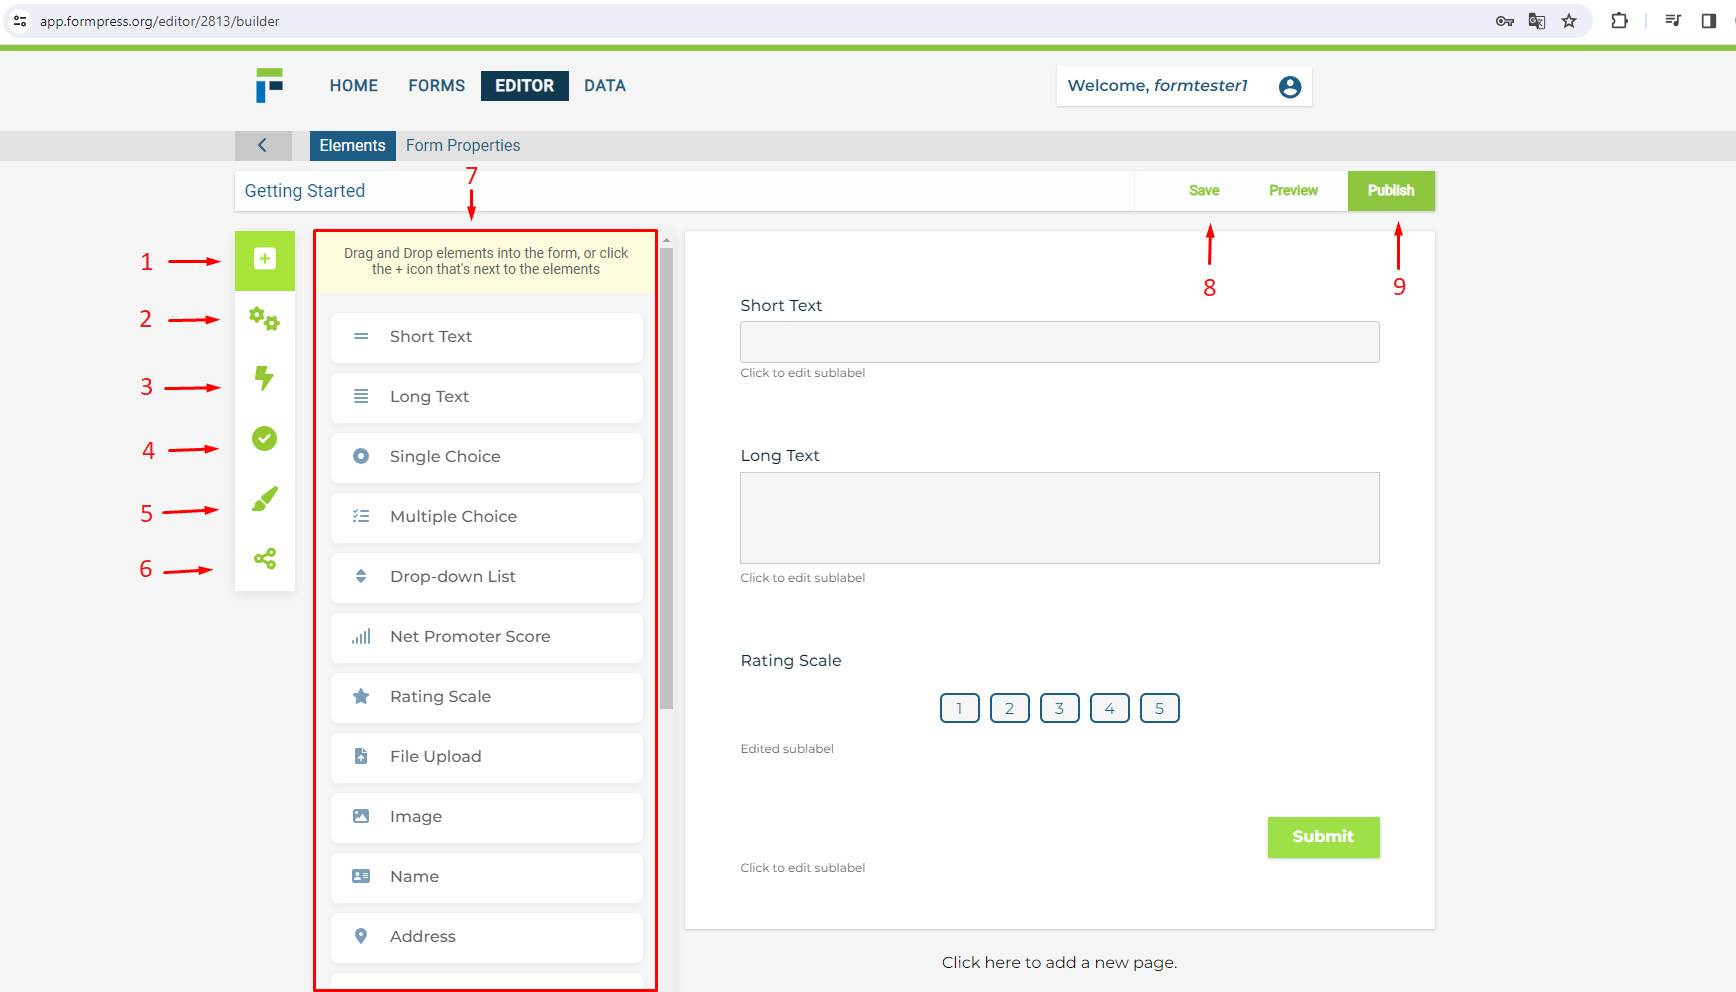
Step 2: Form Editor
Once you've selected your starting point, you'll be directed to the Form Editor page, where you can work your magic. Here's what you'll find:
Build (Current Tab)
This is where you'll create and design your form.
Integrations
Connect your form with third-party apps to enhance its functionality.
Rules
Implement conditional logic to show or hide specific form fields based on user input. For in-depth details, check out our conditional logic blog post.
Thank You Page
Customize the message displayed after form submission. Keep an eye out for future modification options.
Design
Change the theme of your form and even use custom CSS for a personalized touch.
Share
After completing your form, it's time to share it with your audience. Learn more in our share form blog post.
Element List
Easily Drag & Drop form elements to create your ideal form.
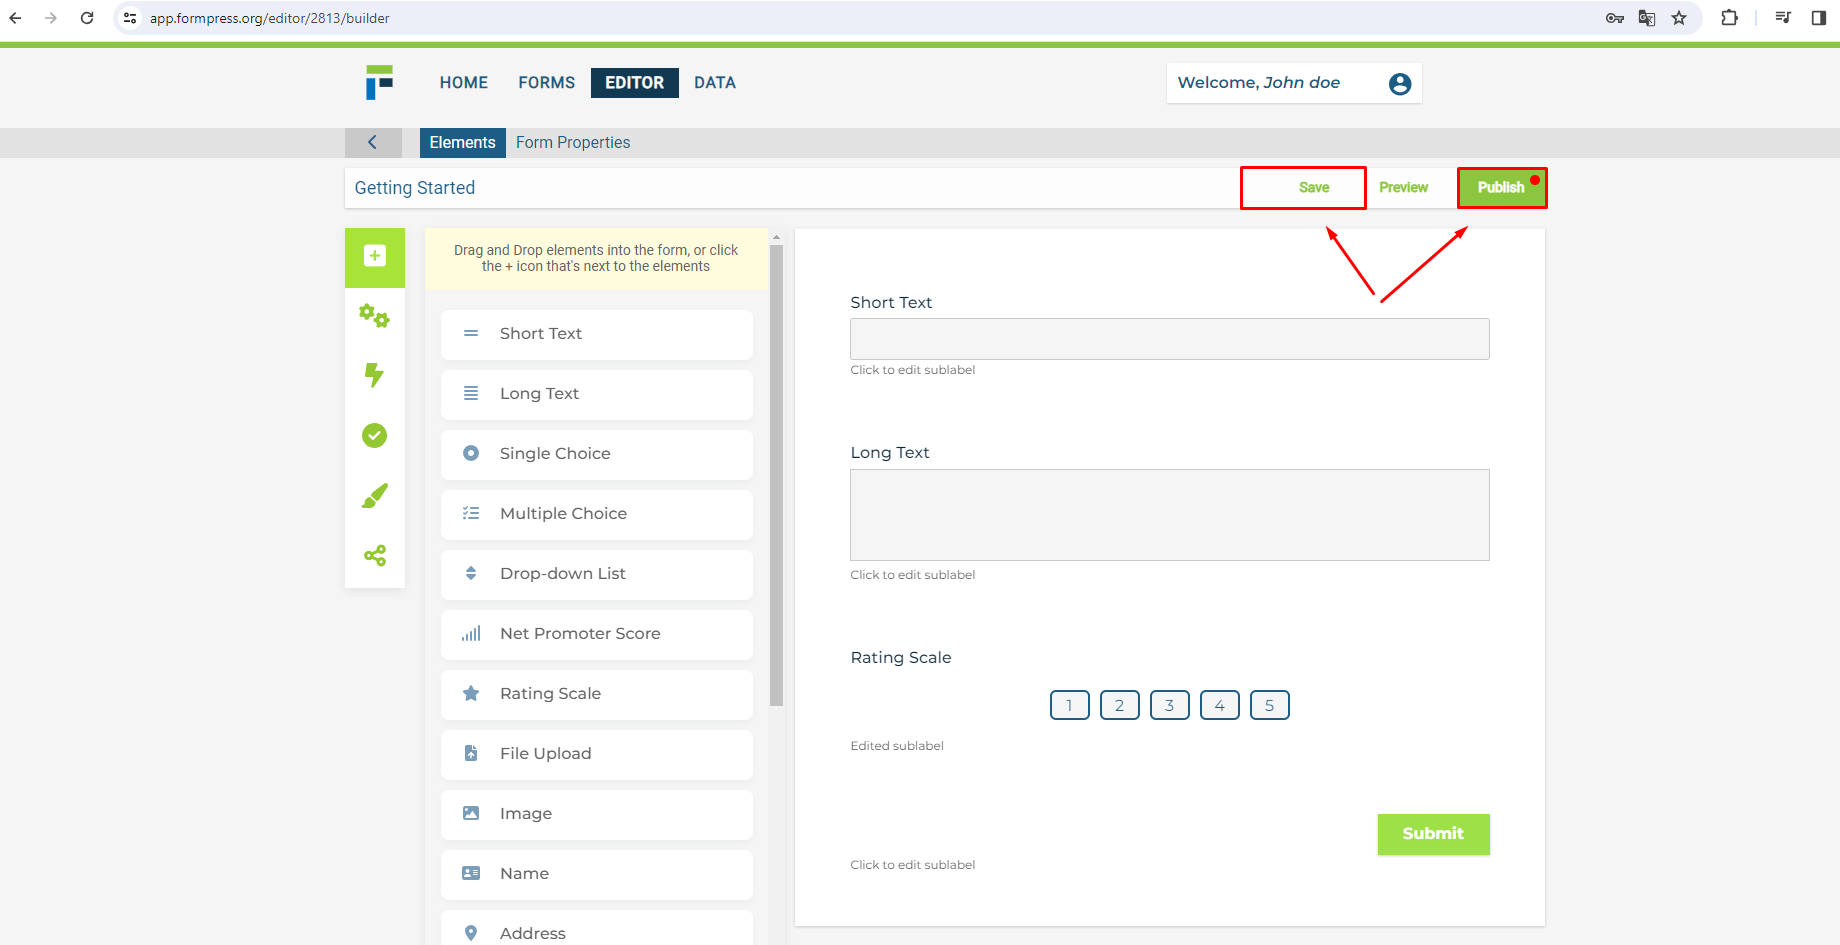
Save
Save changes without publishing.
Publish
Make changes visible to users.
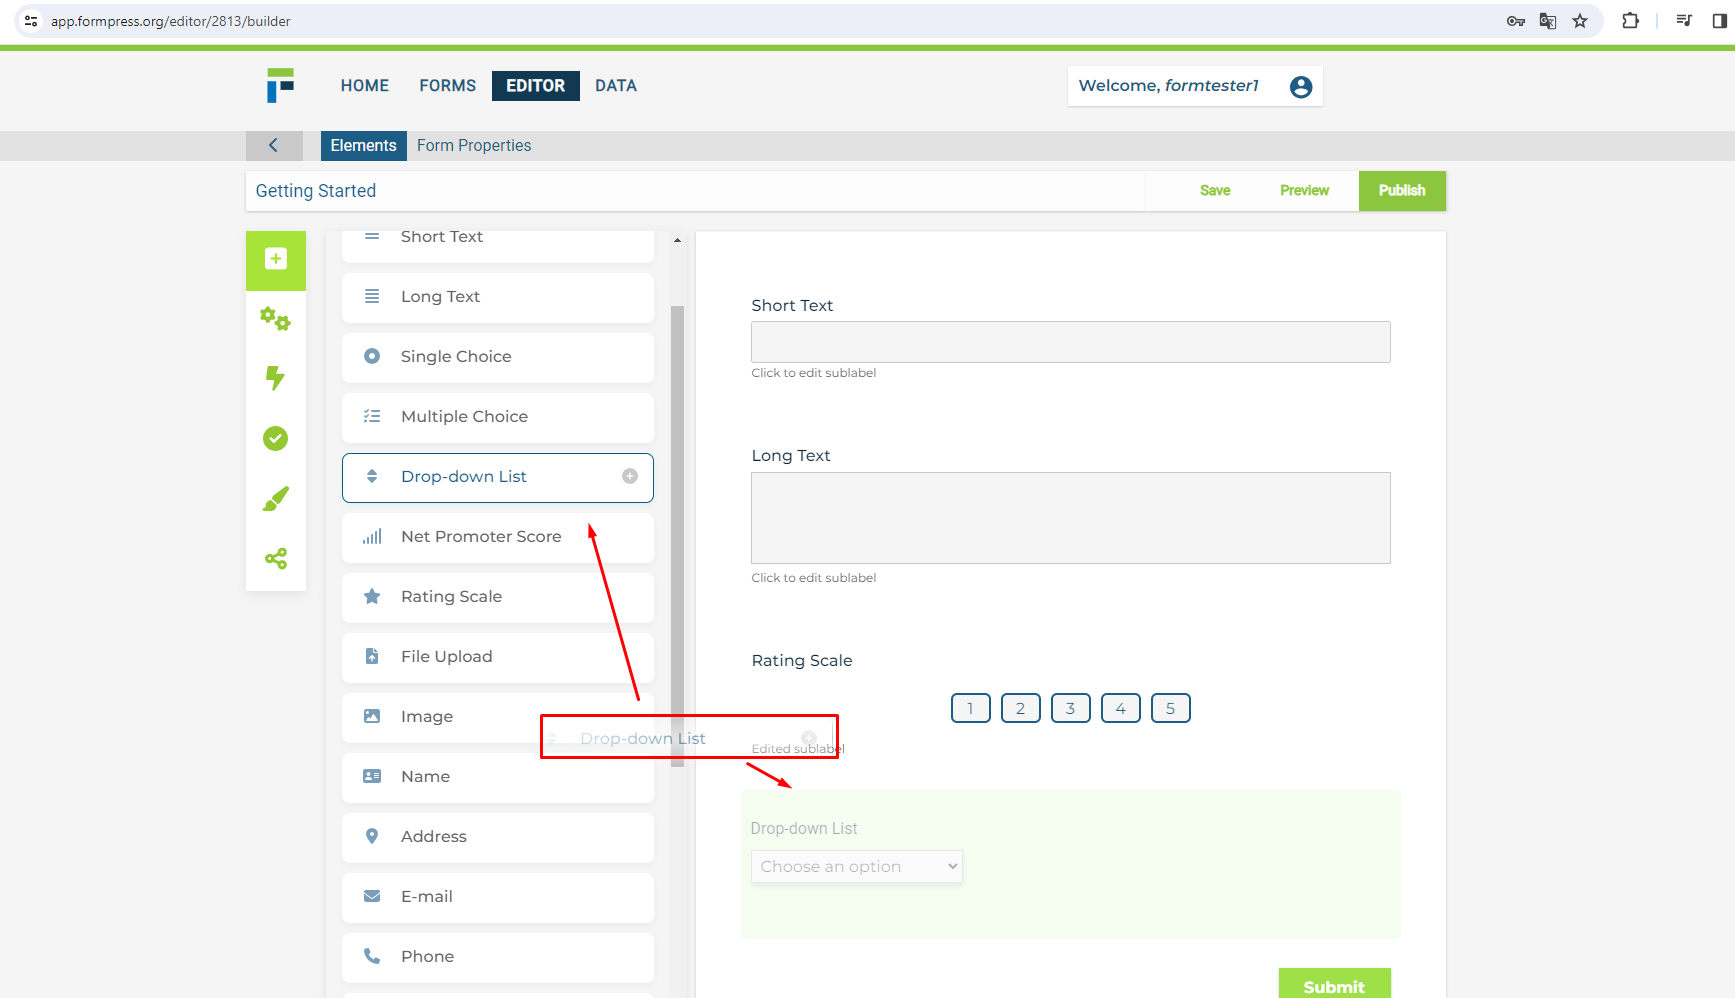
Step 3: Building Your Basic Form
To create a basic form, follow these steps:
Add Elements
Drag and drop form elements from the list onto your form.
Edit Text
You can modify any text in the form by simply clicking on it.
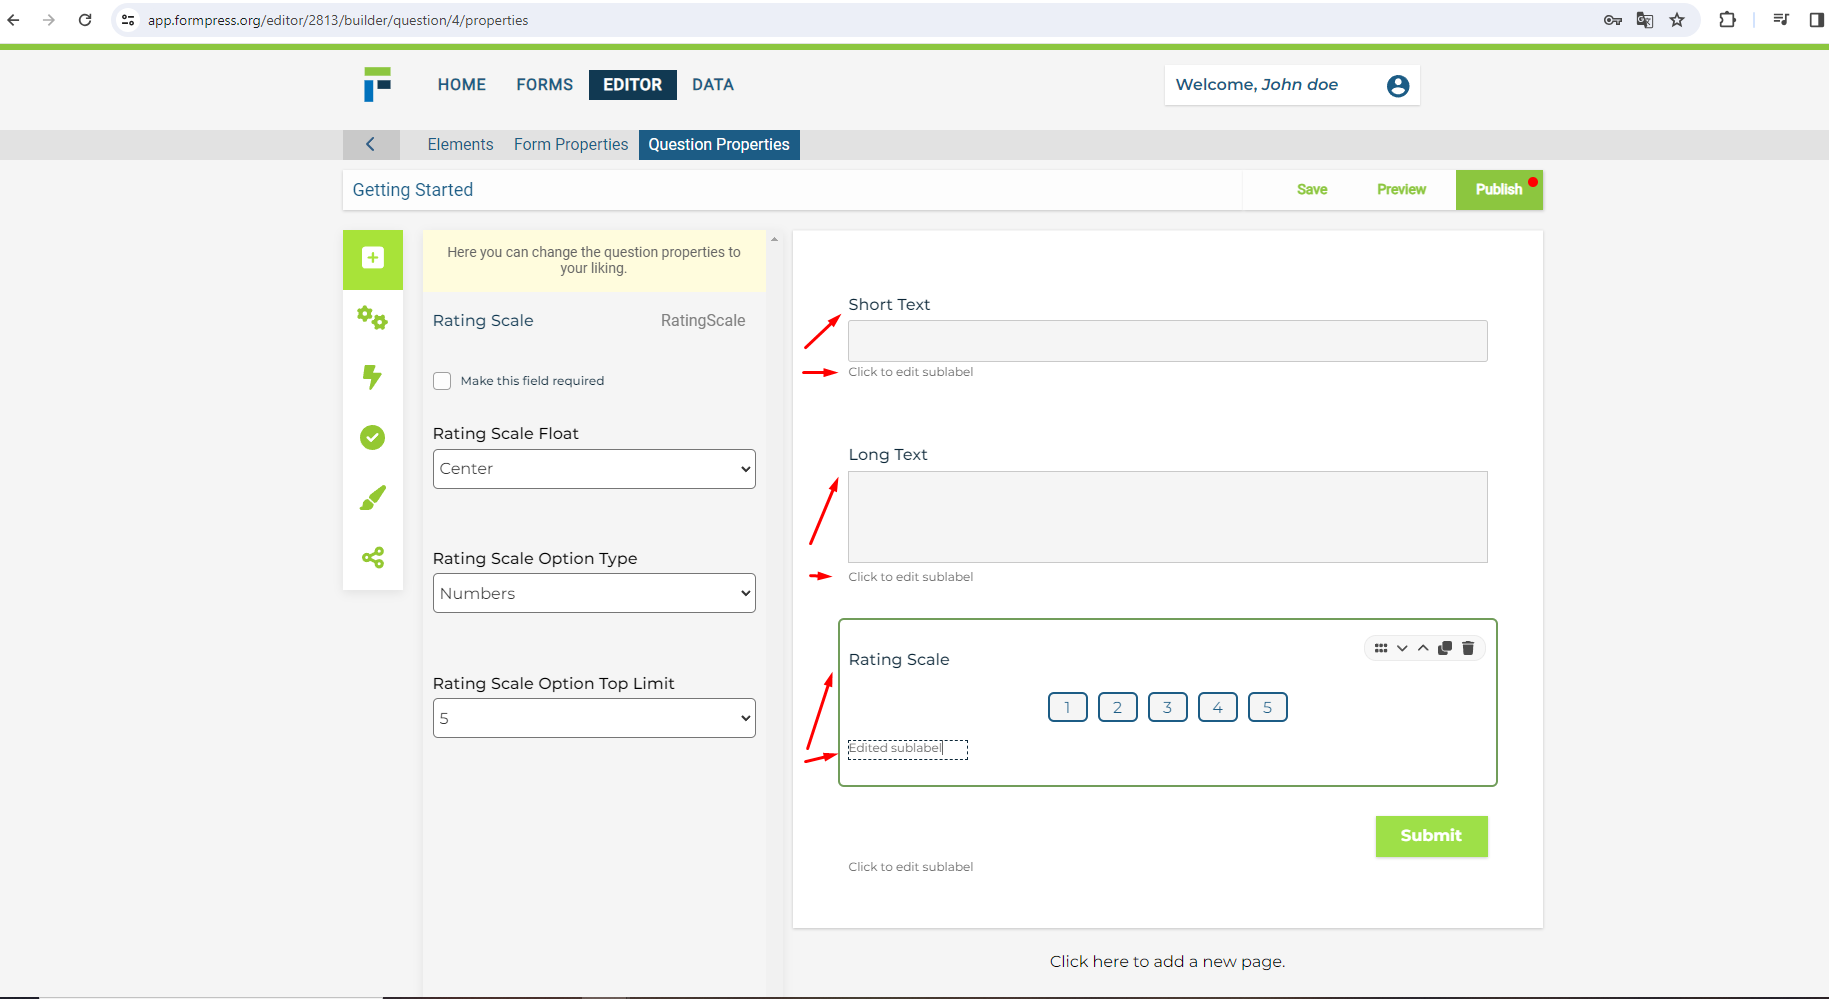
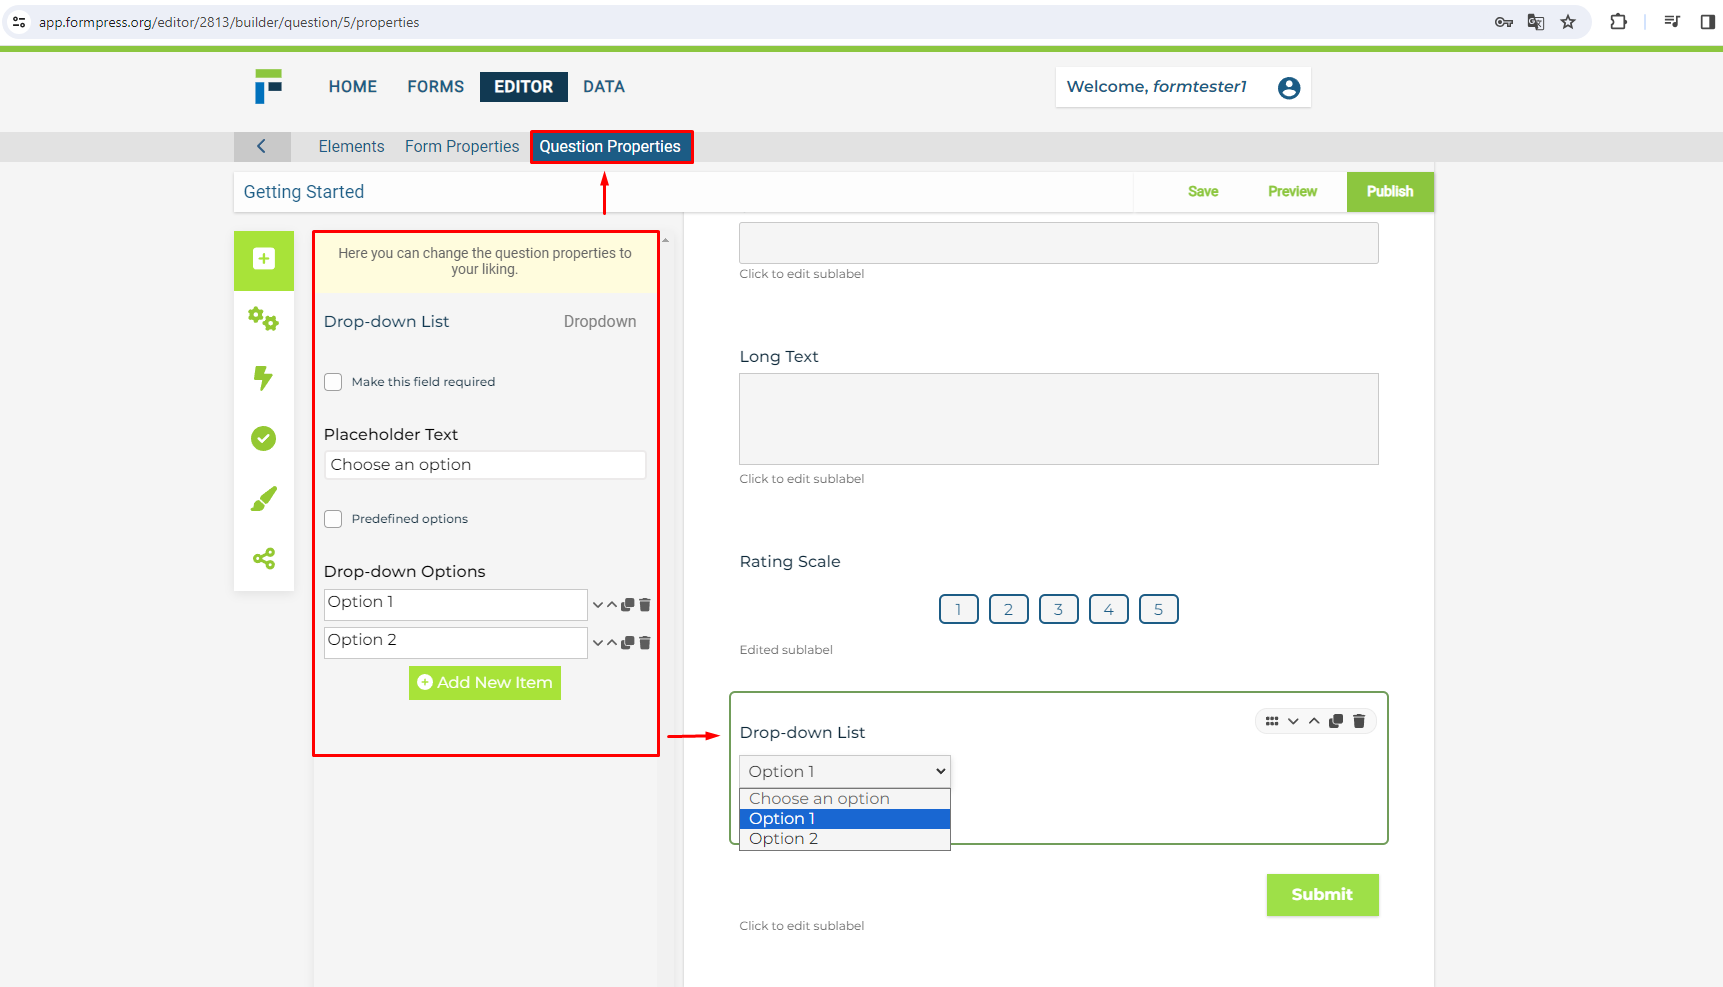
Element Properties
When you click on an element, you can see its properties in the left menu.
Save and Publish
After finishing your form edits, don't forget to save and publish.
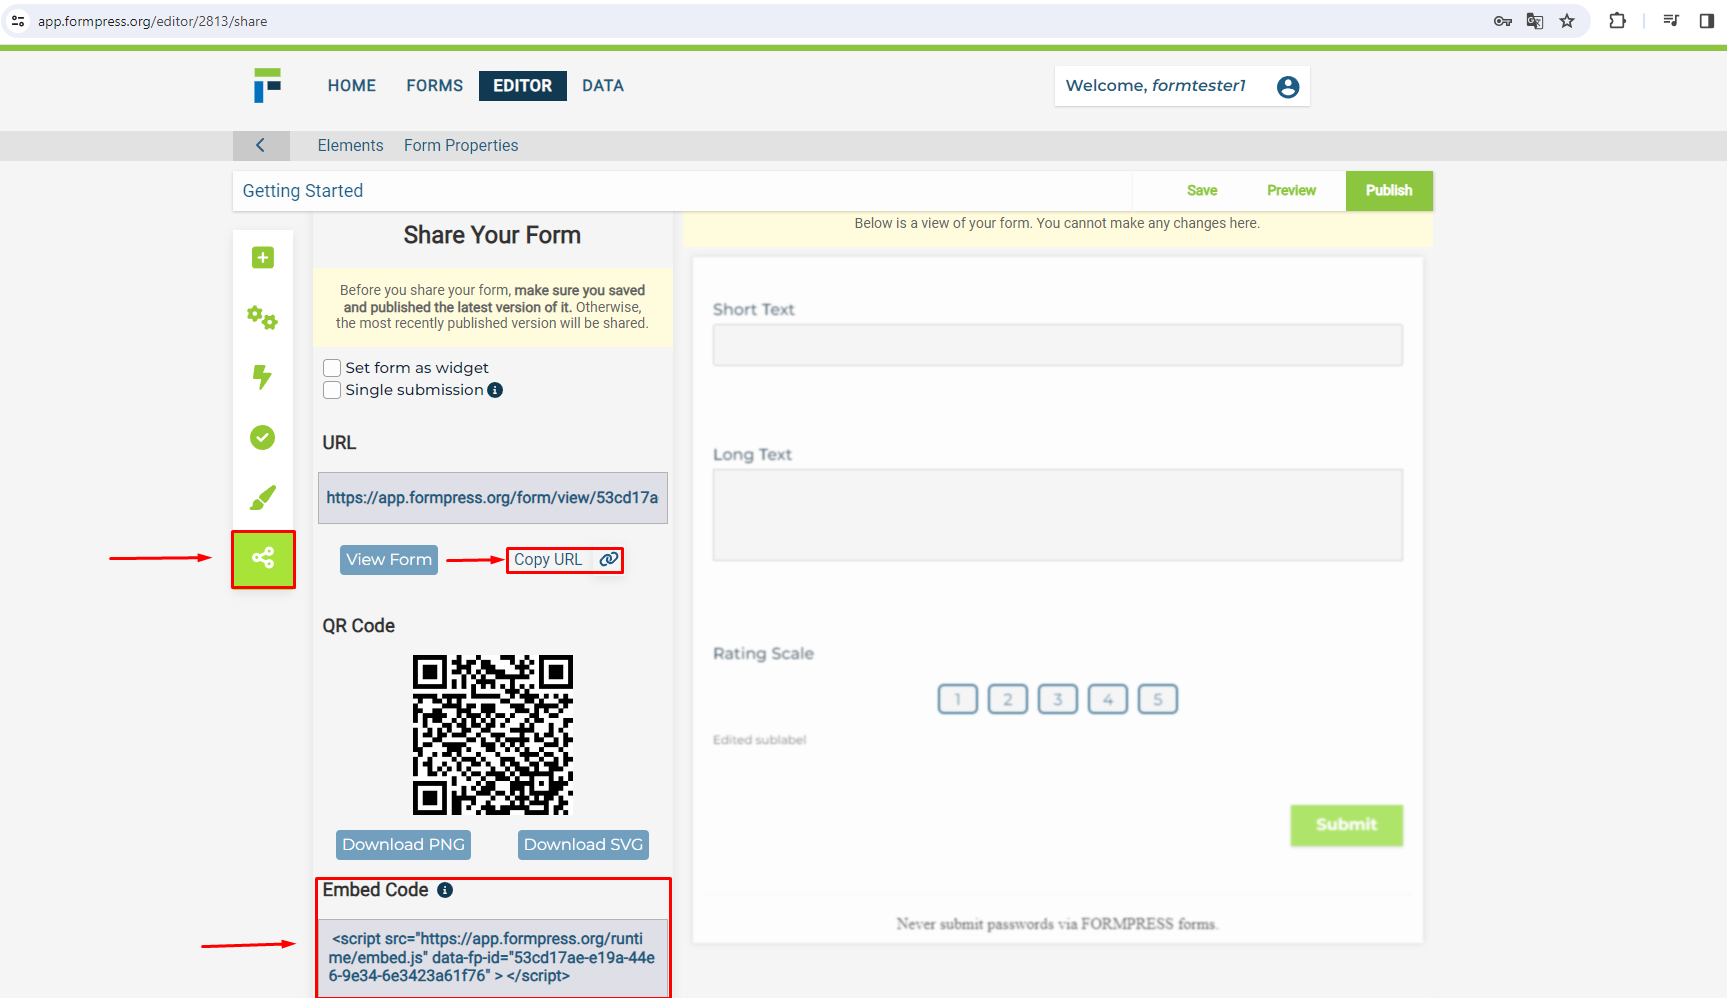
Share Your Form
Share the form link or embed it on your website.
NOTE: Ensure there is a submit button in your form. Users will need this button to send their form.
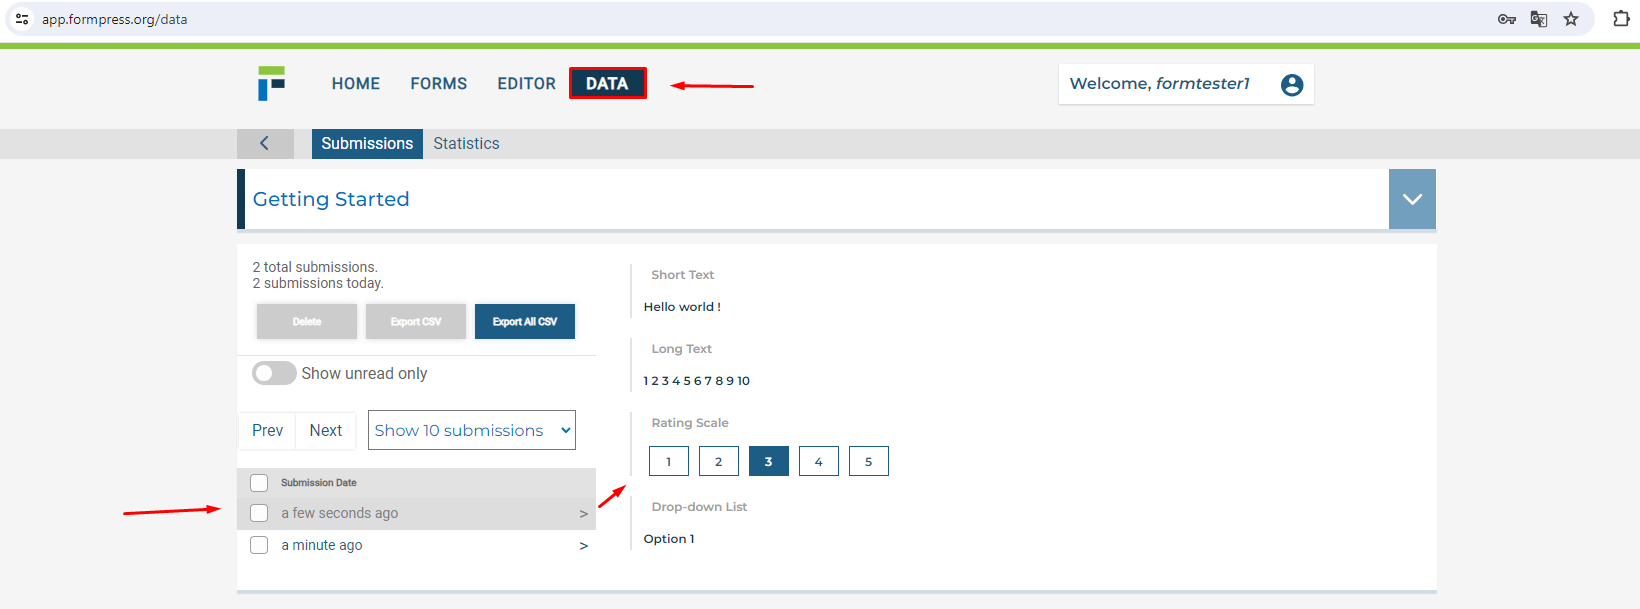
Step 4: Review Responses
Manage Your Data
Check out the Data Page to read and manage responses.
With these steps, you're ready to create, customize, and share your forms with ease. Happy form-building!
