How To Create Online Exams With FormPress
We are excited to announce the launch of a new feature on our website that allows users to create an online form in the form of a single-choice test. This means that from now on, you will be able to create single-choice tests through FormPress’ form builder!
This feature is perfect for teachers who are looking for a quick and easy way to assess their students' knowledge. Not only that, teachers can create tests on a variety of subjects by simply adding the questions themselves. This way, they will be able to customize the tests to fit their specific curriculum and learning objectives.
This can be especially helpful in a remote learning setting, where students may not have access to traditional paper-and-pencil tests. And even if they did, our single-choice tests should be the way to go as it makes things more interactive for both the teacher and the student.
With this new feature, you can quickly and easily create a professional-looking single-choice test that can be shared with anyone, anywhere.
Here are some other benefits of this new feature:
- It saves you time and effort by providing an easy-to-use interface!
- You can specify the right answer of each question if you wish and the students can see the right answer once the test is submitted. This will help them learn in a much more efficient and quicker way!
- Easily customize the questions and add as many choices you want to a single question!
- You can use the Rich Text Editor to add images to the questions!
Before we jump into details, click below link to see a working online quiz:
https://app.formpress.org/form/view/a8b7a936-901e-4050-bd4e-aed71673fe70
Let’s take a look at how easy it is to create a single-choice test by using FormPress and the capabilities of this new feature. Simply follow the steps below to create your own single-choice test:
Step 1
Log in to your account and then click on the “Create A New Form” button from the “Forms” tab.
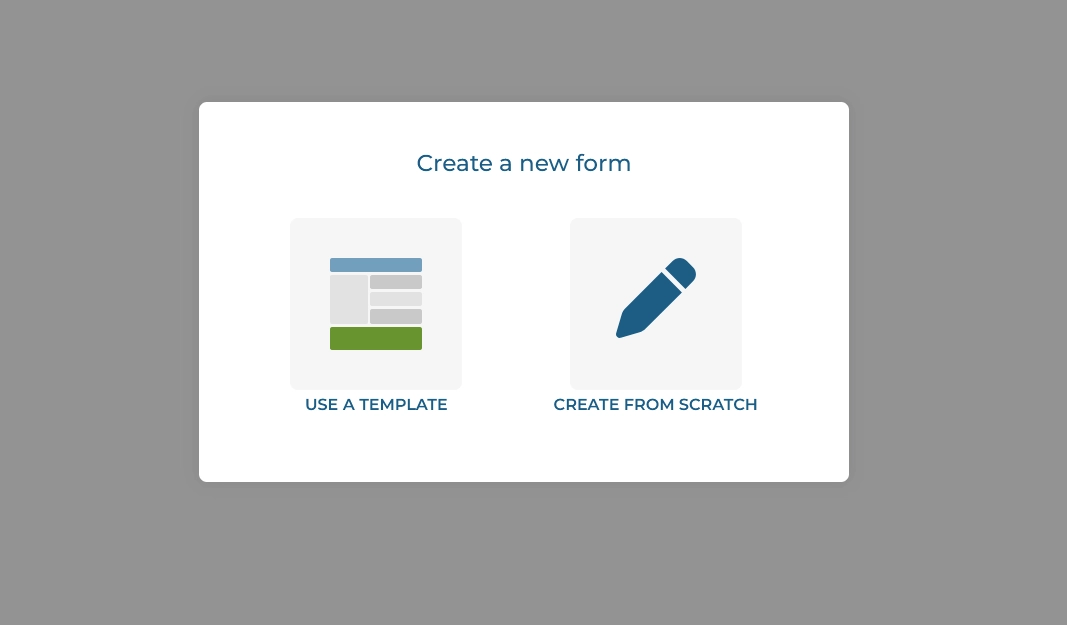
Assuming that you will be creating this single-choice test for the first time, select the option “Create From Scratch”.
Step 2
Give a name to your form to make it recognizable.
Step 3
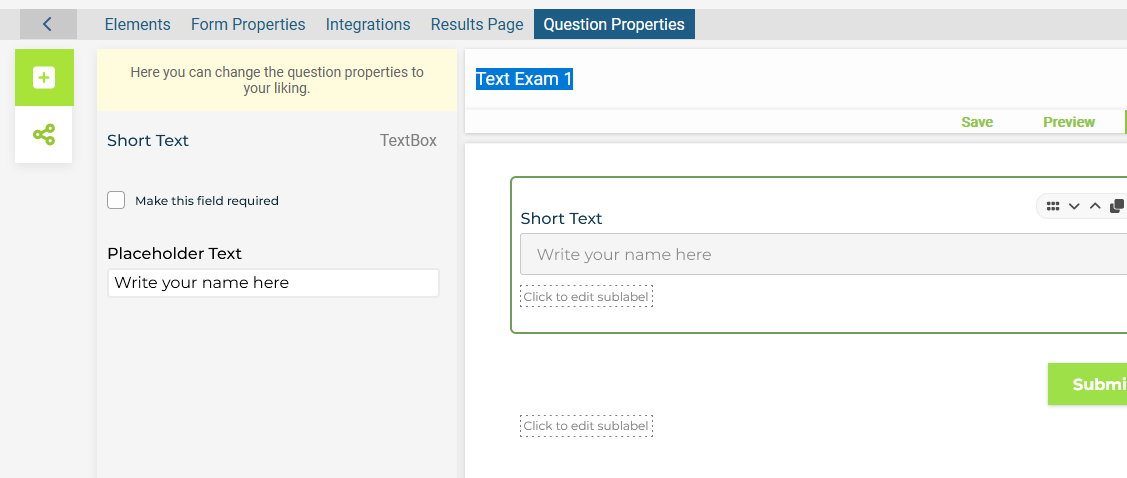
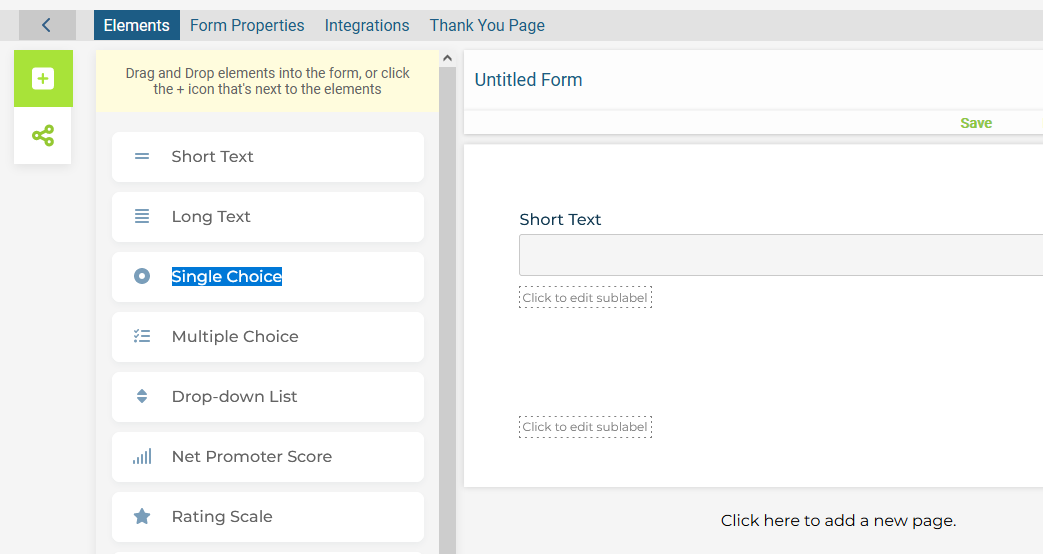
Use the “Short Text” element in order to indicate information such as name or date.
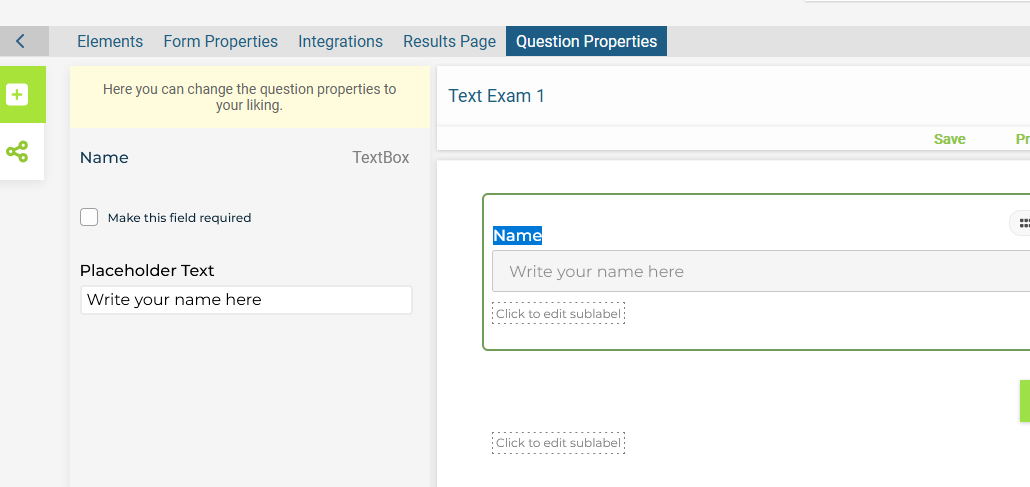
To the box under “Short Text” (Name), you can add a placeholder text. In the example above, “Write your name here” was used as a placeholder text. This will allow students to write their names in the box once the form is created so you will be able to know which results belong to which student.
Step 4
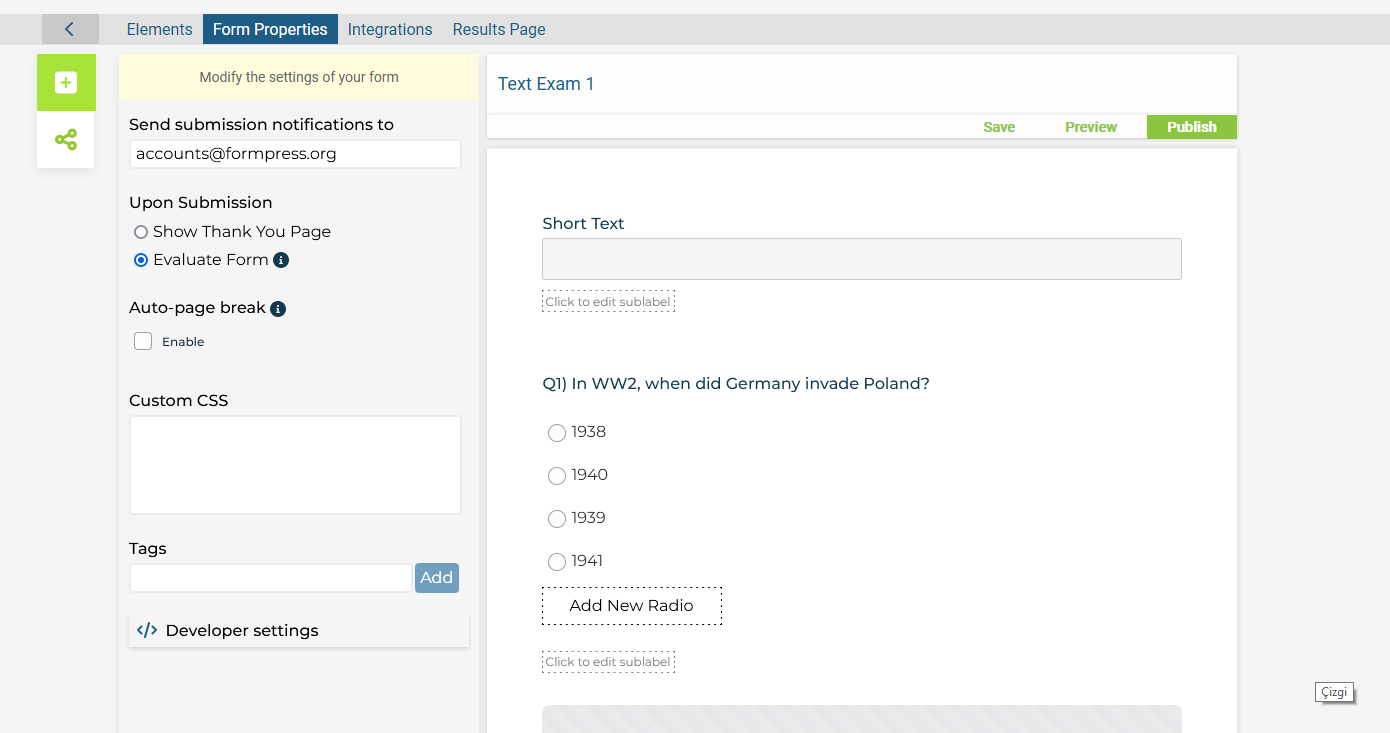
From the “Elements” tab, select and drag the “Single Choice” element under the inserted Short Text element
Once you do, the single-choice question on the form will display as below:
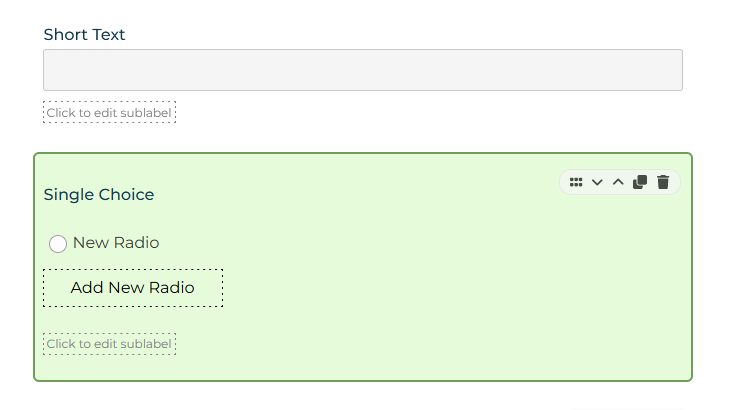
Insert your question to the “Single Choice” box.
Insert the potential answers to “New Radio” boxes. If you want to add more choices to your question, click on the “Add New Radio” button.
Add another “Single Choice” element to add more questions to your form.
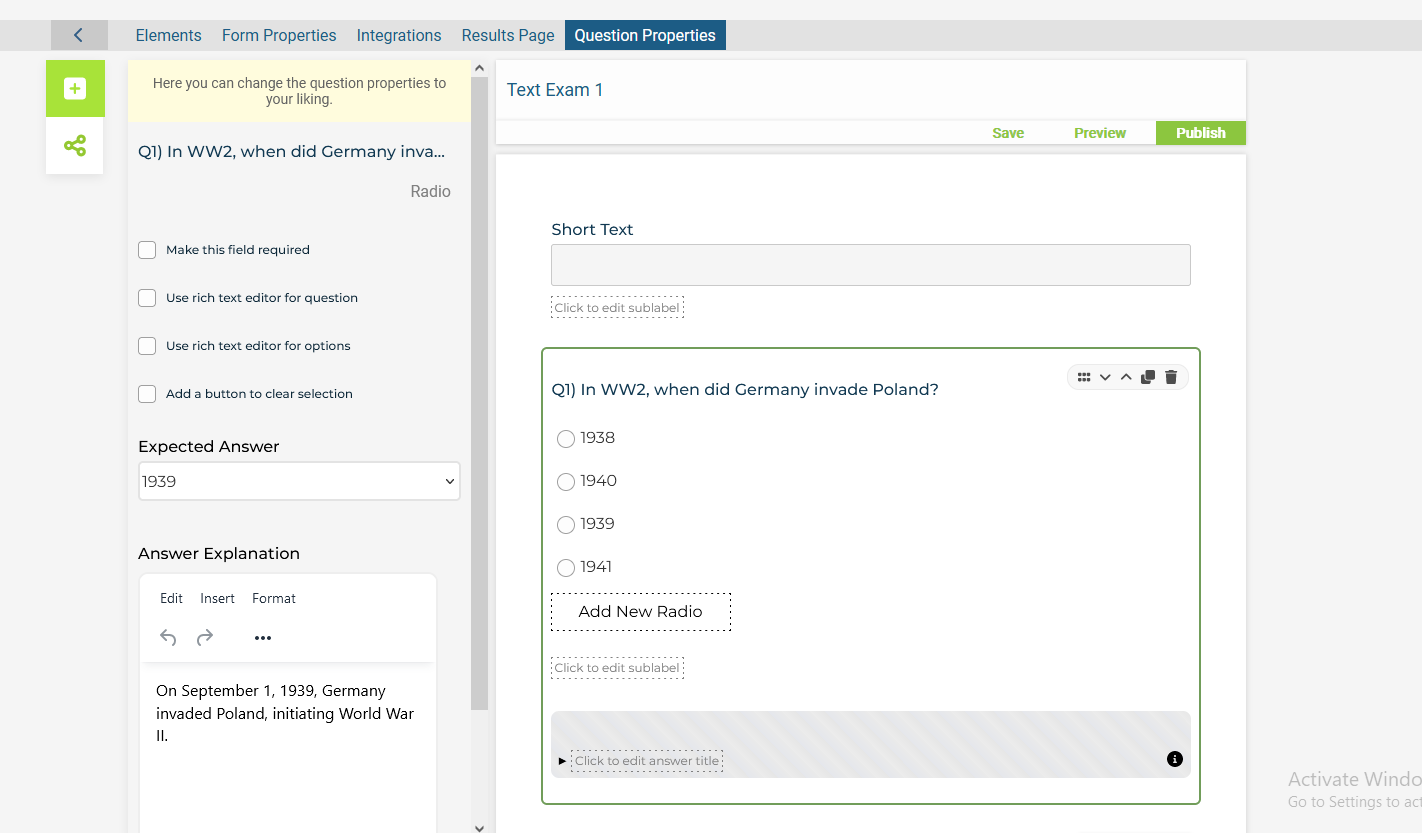
Step 5
When the newly added question is selected, under the “Question Properties” tab, you will be able to provide the right answer and give an explanation if you want to
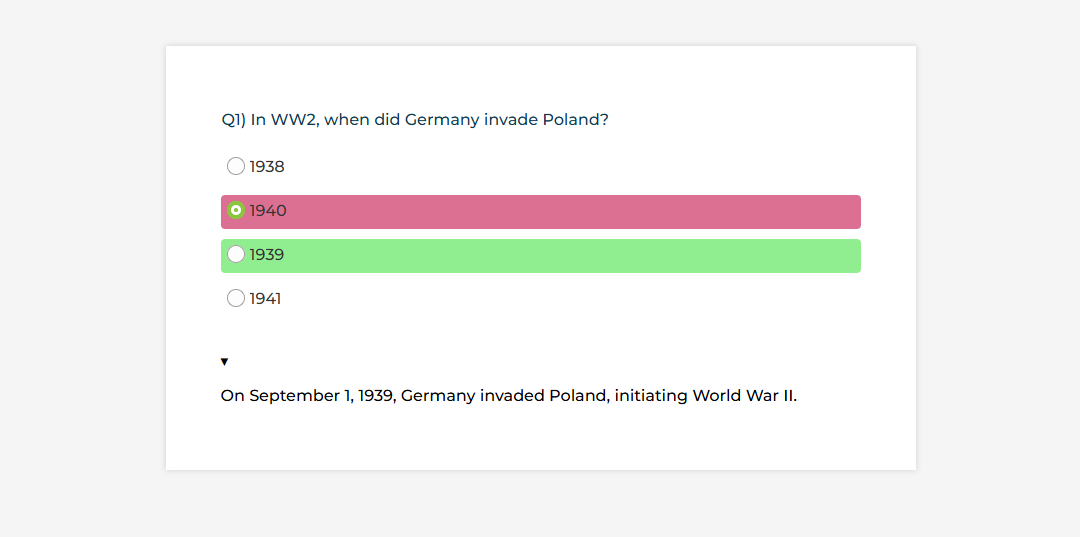
This way, once the test is submitted, your student will be redirected to the results page and see the explanation of the answer as below:
Step 6
By default, FormPress redirects the user to the Thank You Page after submission. This means that if you don’t change the option under the “Upon Submission” section, the students will not be provided any insights.
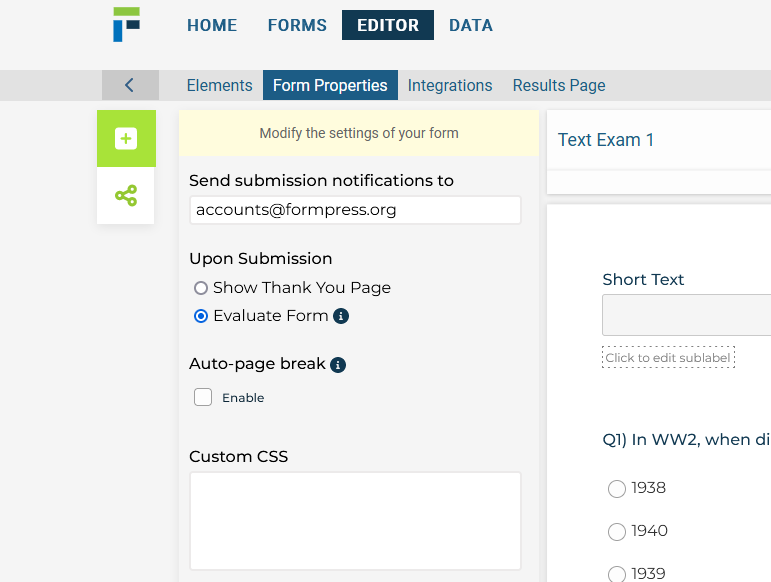
However, if you want your student to see their success rate and the right answer, select the “Evaluate Form” option under the “Upon Submission” section.
This will redirect your student to the Results page as shown below:
Step 7
Now that your form is ready, click on “Save” and then “Publish”.
You can now preview your test to make sure everything’s working perfectly.
… And that’s it! As easy as that. Once you do all these steps, you can start sending out the link of the test to your students. Each student’s answers will be sent to an email address of your choosing.
We are confident that this feature will make tests more fun for the students and provide a better way of learning. Not only that, it will save you a lot of time and make grading easier. So try it out now!